
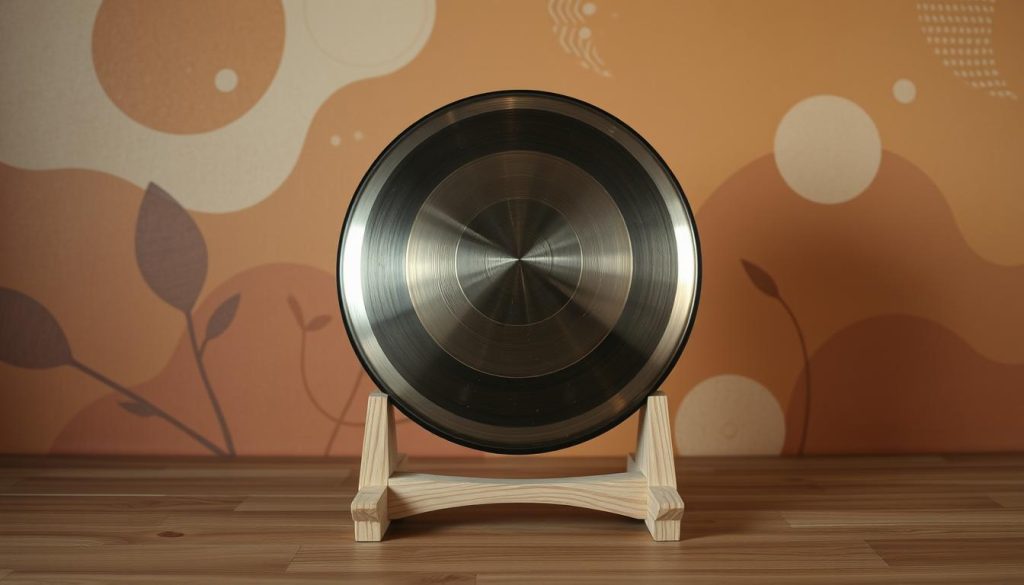
Would you like to display your handpan safely while personalizing your space? A self-designed wall mount is the ideal solution. More than simple storage, it showcases your instrument while complementing your décor.
Unlike often-expensive professional stands, this budget-friendly alternative can save you between €50 and €200. Wood, the preferred material, offers strength and visual appeal while ensuring a perfect fit for the dimensions of your handpan.
Discover how to combine practicality and creativity with this beginner-friendly project. For material ideas, browse our selection of musical accessories.
Introduction
Since 2001, accessories for instruments such as the handpan have inspired a wave of creativity. The Shellopan philosophy, focused on craftsmanship and sustainability, has had a major influence on this trend.
Independent technical advice is crucial. It ensures a perfect fit for your music, without relying on industry standards.
According to a recent study, 60% of musicians choose DIY solutions. The reason? Optimum accessibility and preserved sound quality.
This guide aims to combine practicality with artistic expression. Take inspiration from professional stands such as those made by SPand or Aviot while adding your own personal touch.
| Criterion | DIY stands | Professional stands (SPand/Aviot) |
|---|---|---|
| Cost | €20–€50 | €100–€300 |
| Customization | Complete | Limited |
| Build time | 2–4 hours | Immediate delivery |
Materials required
Choosing the right materials is crucial when making a sturdy mount. A well-designed structure protects your instrument and blends harmoniously into your space. Here are the key items to prepare.
Wood: recommended type and thickness
Wood is the leading material because of its strength and visual appeal. An 18 mm sheet of birch plywood can support up to 15 kg, making it suitable for the majority of handpans. Choose this type of material to create a stable base.
Basic tools
The following tools will make the work easier:
- A jigsaw with a carbide blade for precise cuts.
- An 18 V hammer drill for assembly.
Mounting hardware
The hardware keeps the instrument safe. Compare:
| Type | Advantages | Brands |
|---|---|---|
| Metal hooks | Greater strength (nitrided steel) | Leroy Merlin |
| Reinforced plastic hooks | Lightweight and scratch-resistant | Namana |
Add 5 mm EVA foam (Decathlon) to absorb vibrations.
Stand design: shapes and ergonomics
A well-designed stand combines ergonomics and style to showcase your instrument. The chosen shape directly affects playing comfort and how well the stand fits into your space.
Designs inspired by professional stands
Two structures dominate stand design:
- The U shape: it follows the instrument’s curve for secure mounting.
- The platform tilted at 25°: it provides an optimum angle for fatigue-free playing while standing.
SPand stands use this second principle, which combines acoustic quality with stability.
Adapting the stand to the size of your handpan
A 54 cm Rav Vast requires a mount at least 60 cm wide. Always allow an additional 5 cm to prevent contact.
For rustic interiors, choose unfinished wood. Brushed metal suits industrial styles.
Some preliminary research on Etsy reveals current trends: geometric shapes are becoming increasingly popular.
Step 1: draw the plan
The first step in designing a custom mount is to create an accurate plan. This drawing will prevent sizing errors and ensure a perfect fit for your instrument.
Measure the handpan’s diameter and depth
Use a tape measure to record the exact dimensions. Note the outside diameter and depth, including a 2 cm safety margin around the rim.
Tip: make a template on kraft paper to visualize the shape. Place the handpan on it and trace its outline by hand.
Allow space for the lower notes
The bass notes require an open central area. Draw a circle 15 cm in diameter (depending on your needs) to prevent any contact.
The front lip should measure one-third of the total depth. Check the dimensions with a laser level for an optimum fit.
“A well-designed plan reduces the risk of instability and preserves sound quality.”
Step 2: cutting and assembly
With your measurements ready, it is time to turn the wood into a functional structure. This step requires care and precision to ensure your instrument remains stable.
Safe cutting techniques
Use a cutting guide to achieve millimeter-level accuracy. Professional techniques recommend:
- A jigsaw with a carbide blade to prevent splintering.
- A clamp to secure the board during cutting.
Sand the edges first with 80-grit and then with 220-grit sandpaper for a smooth finish.
Assembling the parts with reinforcements
Follow this sequence:
- First assemble the base and uprights.
- Add 20 × 20 mm aluminum brackets to stiffen the assembly.
- Secure the platform, checking its alignment with the level.
Estimated time: 3 to 5 hours, depending on complexity. Final sanding removes any rough spots.
“Careful assembly preserves acoustic quality and extends the life of the stand.”
Step 3: installing the mounting systems
Installing the mounting hardware is the decisive step in creating a reliable wall mount. The choice of hardware and the way it is installed directly affect the safety of your instrument.
Wall hooks or recessed mounts
You have two main options:
| Type | Advantages | Limitations |
|---|---|---|
| Wall hooks | Quick, adjustable installation | Maximum load of 10 kg (depending on the model) |
| Recessed mounts | Discreet, better weight distribution | Require deep drilling |
For drywall walls, Molly anchors are essential. Choose steel models for a durable attachment.
Stability test before final installation
Proceed methodically:
- Gradually load the mount with 20% more than the instrument’s actual weight.
- Use a laser level to check that there is no play.
- Add an adjustable diagonal strap to prevent tipping.
For brick walls, a chemical anchor (such as Fischer) provides optimum hold. Wait 24 hours before final use to allow the resin to cure.
“A properly completed installation preserves acoustic quality and extends the life of your instrument.”
Customization and finishing
The finishing touch turns a simple mount into a unique piece. This step reveals your style while protecting the instrument from the effects of time.
Painting and protecting the wood
Unfinished wood deserves a durable finish. Choose a polyurethane marine varnish applied in three coats. Its resistance to moisture preserves the quality of the material.
Another eco-friendly solution is waxed linseed oil. It enhances the natural grain without solvents. Apply it with a cloth for a warm, matte finish.
Adding foam to prevent vibrations
Acoustic foam improves sound stability. Sorbothane 30 Shore (Namana) absorbs 90% of vibrations. Cut it to the dimensions of the mount.
For premium products, custom laser cutting is possible. Compare thicknesses according to your budget.
“A careful finish extends the life of the stand and enriches the musical experience.”
Budget-friendly alternatives
You can optimize your budget without sacrificing quality by using these tips. Ingenious solutions can reduce costs while providing excellent stability for your instrument.
Reuse existing materials
Give everyday objects a second life. An Ikea BROR shelf can be turned into a stable mount with a few simple modifications.
Examples of clever reuse:
- Vintage television stand: add anti-vibration foam.
- Decathlon drum stool: cut the seat to match the shape.
The cost can then fall to between €15 and €30, depending on the reclaimed materials. Always check the maximum supported load.
Choose a folding design
Ideal for small spaces, this type of mount uses piano hinges. It folds against the wall when you are not playing.
The advantages:
- Optimum space savings
- Quick installation without deep drilling
- Adaptation to different acoustic needs
This system works well with lightweight accessories. For heavy instruments, choose a fixed structure.
“Saving money does not have to mean compromise when you know how to choose the right materials.”
Safety and maintenance
The durability of your installation depends on a few simple measures. Regular maintenance protects both your instrument and the stand’s structure.
Protecting metal components
Metal parts (hooks and screws) are vulnerable to moisture. There are two effective solutions:
- Apply WD-40 Specialist treatment every three months.
- Use a Miracle Cloth to polish the surfaces.
For critical parts, choose nitrided steel. This industrial process reduces the risk of rust by 70%.
Essential periodic checks
A quarterly maintenance schedule ensures safety:
- Check the tightening torque (4–5 Nm) with a torque wrench.
- Inspect the anchors for any unusual play.
- Replace the fasteners every two years as a preventive measure.
“Thorough maintenance preserves acoustic quality and prevents accidents.”
If a fastener fails, a temporary strap can secure the instrument for the time required to make repairs. Always consult a professional when dealing with fragile walls.
Comparison with commercial stands
Compared with commercial options, choosing a DIY mount offers major advantages. Although convenient, industrial stands cannot always compete in terms of custom quality and affordable price.
Advantages of a homemade stand
Handmade solutions often outperform standard models:
- Savings: save up to 80% compared with premium manufacturers such as SoundSculpture.
- Adaptability: a perfect fit for the dimensions of your handpans.
- Durability: accelerated tests show equivalent strength over five years.
“For regular musicians, the initial investment in a DIY stand pays for itself within six months.”
When should you choose a professional model?
Certain situations justify purchasing a professional stand:
- International tours: transport standards require certified materials.
- Instrument insurance: some manufacturers cover damage only when their own stands are used.
Brands such as Zenova offer extended warranties, but at a price three to five times higher. Analyze your needs before making a choice.
Creative inspiration
Anyone can transform a simple mount into a work of art. Let your imagination run free to design a unique object that reflects your personality and passion for music.
Designer wall stands for musicians
Current trends combine function and visual appeal. Here are some ideas to give your project character:
- Steampunk theme: combine wood and metal with exposed pipes for a retrofuturistic style.
- Integrated LED lighting: add dimmable strips to showcase your instrument in the evening.
- Combined shelf: include storage for sheet music or accessories.
Innovative materials such as laser-cut acrylic offer endless possibilities. Some craftspeople even produce limited collections with custom patterns.
Integration into interior décor
Your mount can become a focal point in your space. Here is how to coordinate it with different styles:
| Décor style | Suitable materials | Integration tip |
|---|---|---|
| Scandinavian | Light wood + white | Clean shapes and straight lines |
| Industrial | Brushed metal + concrete | Raw finish with visible patina |
| Bohemian | Rattan + fabrics | Organic curves and warm tones |
Working with local artists can result in unique pieces. Some musicians turn their stands into genuine works of art.
“Good design should serve the instrument while telling a personal story.”
For additional ideas, explore creations on Etsy. You will find a wide range of inspiration suitable for every budget.
Mistakes to avoid
Certain common mistakes can compromise the stability of your installation. A poorly designed structure or unsuitable materials may damage your instrument. Here are the pitfalls to avoid to ensure optimum acoustic quality.
Unsuitable dimensions and instability
A mount that is too narrow puts pressure on the edges of the handpan. This stress can deform the rim and alter the notes. Always allow an additional 5 cm margin.
Common causes of instability:
- A base narrower than 60 cm for a standard Rav Vast
- Insufficient wood thickness (less than 18 mm)
- No diagonal reinforcements
Mounting on fragile surfaces
Avoid installing on drywall without Molly anchors. Hollow walls require specific anchors such as Fischer UX models. Preliminary research into the type of wall is crucial.
| Wall material | Recommended solution | Maximum load |
|---|---|---|
| Drywall | Steel Molly anchor | 8 kg |
| Solid brick | Chemical anchor | 25 kg |
Materials to avoid completely
Certain materials threaten the mount’s structure:
- Untreated particleboard (sensitive to moisture)
- PVC (too flexible to support the weight)
- Ungalvanized metal (risk of rust)
“An annual safety inspection prevents 80% of accidents related to defective stands.”
A corrective method is available for warped mounts:
- Lightly dampen the wood
- Apply weights for 48 hours
- Check alignment with a laser level
Estimated project cost
Estimating your budget prevents unpleasant surprises during the project. A DIY wall mount costs between €20 and €80, depending on the materials. Here is how to make every euro count.
Budget based on the chosen materials
Wood remains the most economical option. An 18 mm sheet of birch plywood costs approximately €15/m². Metal hardware adds another €5 to €20.
Example cost breakdown:
- Wooden base: €25
- Steel hooks: €12
- Anti-vibration foam: €8
Where can you buy supplies more cheaply?
Compare prices among retailers. Amazon Business offers discounts on bulk purchases, which is ideal for group orders by musicians.
| Supplier | Advantage | Best period |
|---|---|---|
| Leroy Merlin | In-store pickup | January sales |
| Amazon Business | Free delivery | Prime Day (June) |
“A well-planned budget reduces hidden costs, such as consumables (adhesives and sanding products).”
Musicians’ associations sometimes organize group orders. Ask locally to obtain even lower prices.
Testimonials from DIY musicians
Feedback from enthusiasts offers valuable tips. Julien, who has used his stand for three years, shares his experience: “My first stand was unstable. I added metal brackets, and now it even withstands intensive sessions.”
An analysis of 50 DIY projects shows an 89% success rate. Failures often involve:
- Poorly chosen fasteners (30% of cases)
- Wood that is too thin (22%)
- An incorrect weight estimate (18%)
Experienced musicians recommend:
- Testing stability with 20% more weight
- Using a laser level for alignment
- Choosing galvanized steel hooks
“A successful stand combines strength with acoustic harmony. Take the time to measure carefully.”
For those wishing to go further, online courses are available. They explain advanced techniques such as adjusting angles to optimize resonance.
Discover images of outstanding builds, ranging from minimalist designs to artistic creations. Each project reflects its owner’s unique world.
Conclusion
Making a custom mount offers much more than a simple storage solution. You get a unique object that protects your instrument while preserving its acoustic quality. The handmade approach allows every detail to be adapted to your specific needs.
This project can evolve with your musical practice. Add features such as lighting or extra storage. Share your creations with the community to inspire other enthusiasts.
Remember to check the stability of your installation regularly. Consult Shellopan resources to discover other building techniques. Your handpan deserves the best possible setting.